How to Grow Mushroom Cultures on Agar Petri Dishes
Have you ever wondered how live mushroom cultures are grown and stored on agar petri dishes? Agar work lets mycologists and hobbyists preserve, clean up and propagate their favorite mushroom strains. In this agar petri dish guide, we take you from spores or tissue to a thriving, clean culture. We also show you how to keep it healthy for months.
What Is an Agar Petri Dish?
Agar is a gelatinous substance made from seaweed. When you mix it with nutrients such as malt extract and yeast, it forms a firm, nutrient-rich surface. Mycelium, the vegetative part of the fungus, grows well on it. Because you can see every bit of growth on the plate, you can easily spot contamination. As a result, you can select the strongest, cleanest mycelium.
You can pour your own plates, but that requires a pressure cooker and a clean workspace. Ready-to-use malt yeast agar petri dishes are poured under sterile conditions, so you can start straight away.
Step 1: Start from Spores or Tissue
The process begins with spores or a small tissue sample from a mature mushroom. Then you carefully transfer them onto the sterile surface of an agar petri dish.
- Spores: germinate best on a low-nutrient plate. Our spore starter agar plates use a light malt and yeast recipe designed for germination.
- Tissue (cloning): a small piece taken from inside a healthy mushroom gives you an exact genetic copy of that mushroom. Read more in our guide on improving mushroom genetics through cloning.
Step 2: Germination and Primary Isolation
Once you place spores on the agar, they germinate and begin to form mycelium. Over time, the mycelium spreads across the dish as a delicate network of white or colored filaments. This stage is called primary isolation. During this stage, you select the sections with the most vigorous, healthy growth. In this way, you can isolate unique strains or varieties.
Seal each plate with Parafilm after inoculation: it keeps contaminants out while still allowing the minimal gas exchange the culture needs.
Step 3: Subculturing to Keep Your Culture Clean
To maintain a live culture, regularly move a small piece of mycelium onto a fresh agar plate. This process is called subculturing, and it keeps the culture vital and long-lived. Always take mycelium from the cleanest, leading edge of growth. That way, you leave contamination behind and keep a healthy, pure strain.
Work in still air or, ideally, in front of a flowhood or HEPA fan filter unit, and wear nitrile gloves to reduce the risk of contamination.
Step 4: Storing Live Cultures
Proper storage is crucial for the longevity of live cultures. Most growers keep their plates in a fridge at around 4–8°C (39–46°F). The cool temperature slows down the mycelium. As a result, the culture lasts much longer. In addition, label every plate with the strain and date so you can track your genetics.
From Agar to Grain and Liquid Culture
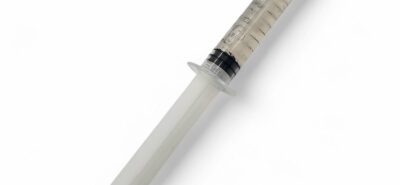
Once you have a clean culture on agar, you can move it on to the next stage: transfer a wedge of mycelium to sterilized grain, or expand it in a pre-sterilized liquid culture vial. Not ready to work with agar yet? Our ready-made liquid culture syringes contain isolated genetics, so you can skip straight to inoculation.
Conclusion
An agar petri dish is a practical way to preserve your favorite strains. It is also a valuable tool for experiments. With each transfer, you learn more about your cultures. In short, agar work is an essential skill for every mycologist.